Việc thiết lập SMTP của Gmail cho WordPress để gửi mail trong trường hợp hosting không thể gửi mail (chức năng chính của hosting không dùng để gửi mail), vì vậy HOSTVN sẽ hướng dẫn quý khách việc cấu hình chi tiết để gửi mail trên mã nguồn WordPress.
Phần I. Cấu hình WP Mail SMTP
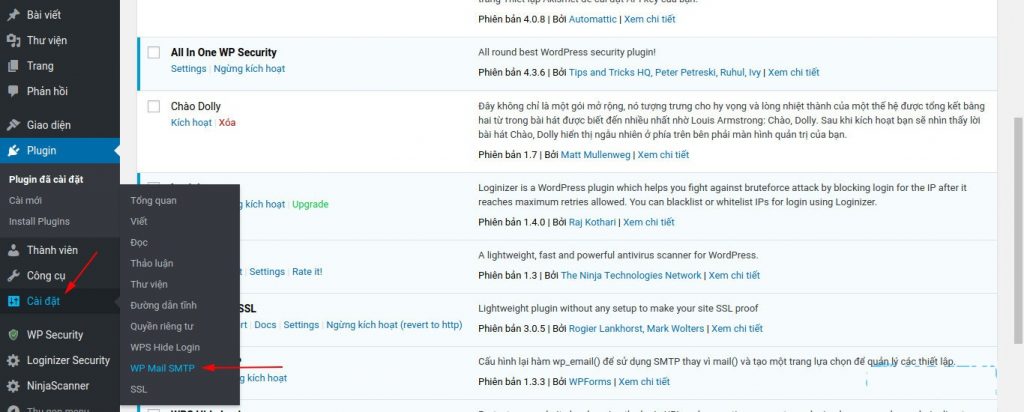
Bước 1: Cài đặt plugin WP Mail SMTP by WPForms
Sau khi cài xong quý khách nhớ kích hoạt plugin.
Bước 2: Cấu hình plugin WP Mail SMTP
Truy cập vào Cài đặt -> WP Mail SMTP
Nhập các thông tin theo yêu cầu.
Mail đi: Email dùng để gửi mail
Tên người gửi: Tên người gửi sẽ hiển thị trong email
Phương thức gửi mail: Chọn Gmail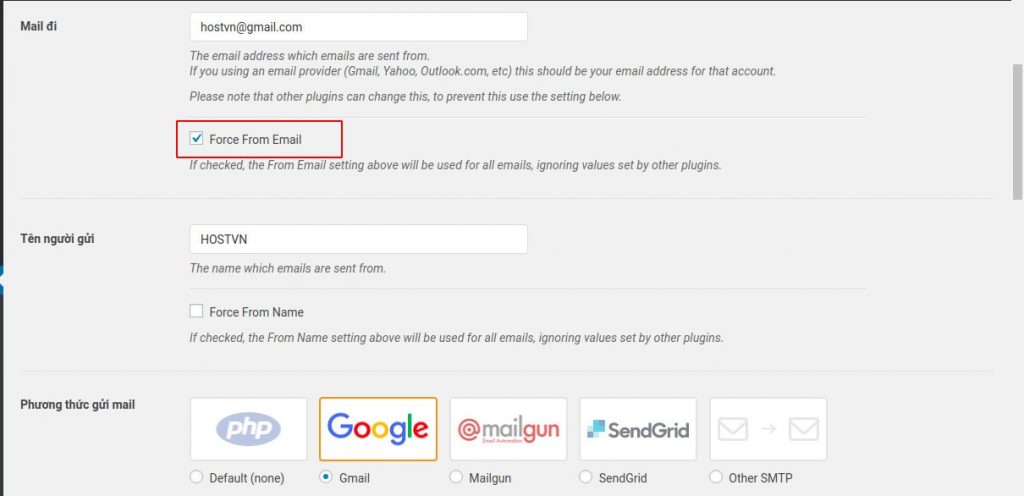
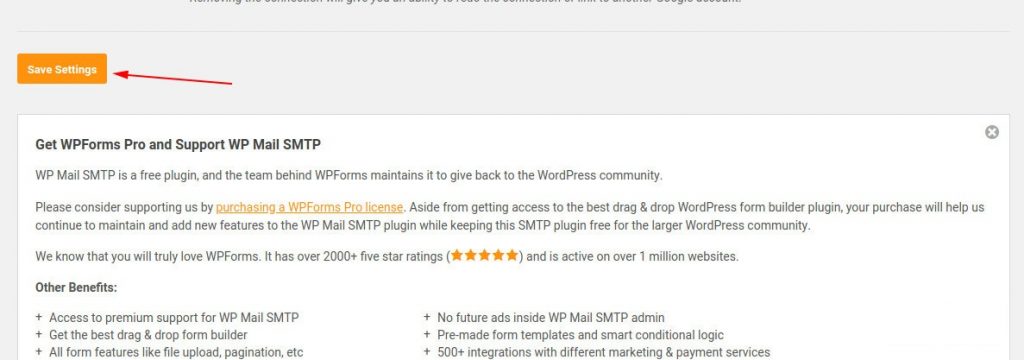
Sau khi điền các thông tin trên quý khách kéo xuống dưới và bấm Save Setting
Phần II: Tạo google Client ID và Client Secret
Để có thể gửi mail quan SMTP Gmail quý khách sẽ cần tạo Client ID và Client Secret
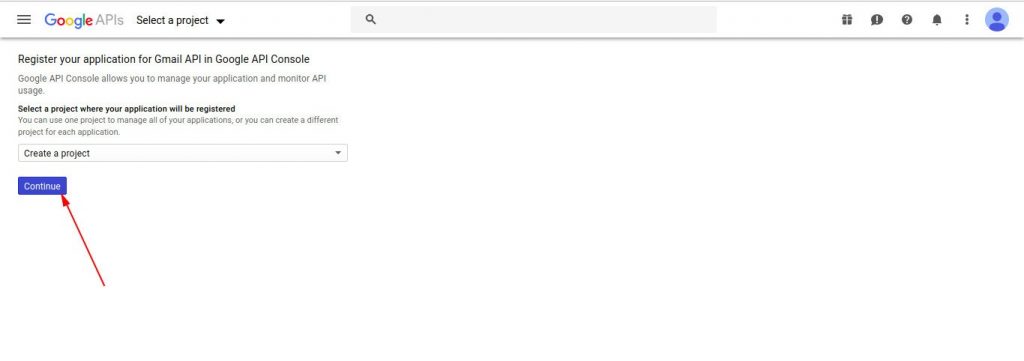
Truy cập link https://console.developers.google.com/flows/enableapi?apiid=gmail&pli=1 và đăng nhập với email quý khách đã cấu hình ở phần 1
Sau đó bấm nút Continue
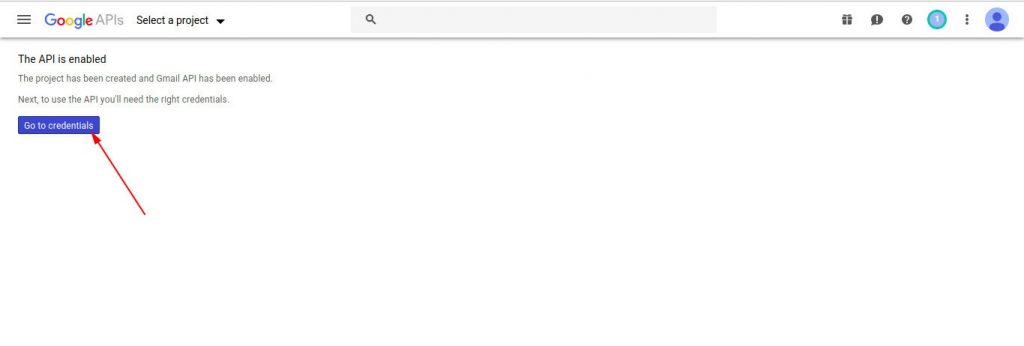
Tiếp tục chọn Go to credentials
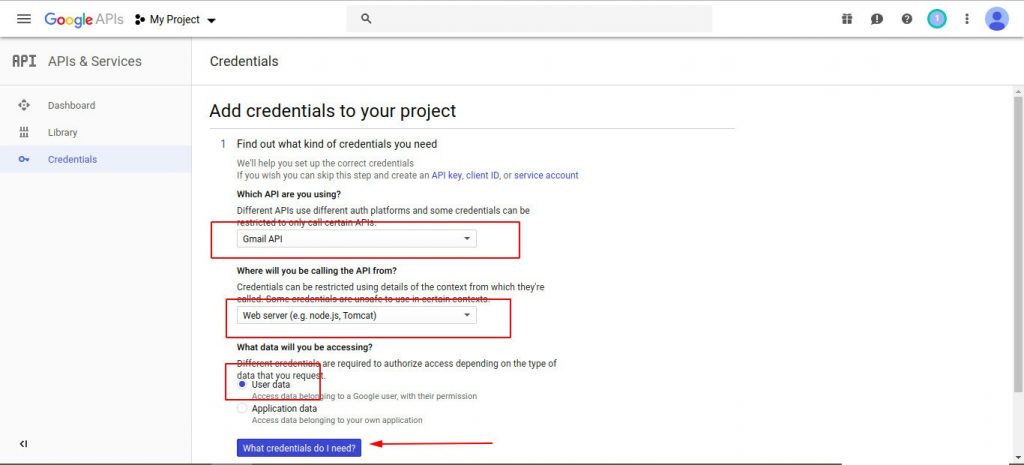
Tại đây quý khách chọn như trong ảnh và bấm vào nút What credentials do I need?
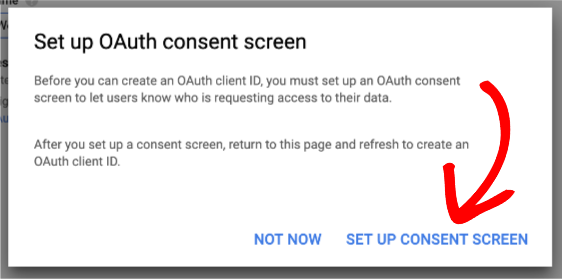
After clicking this button, Google will show a popup asking you to set up a consent screen. Go ahead and click on the Set Up Consent Screen Option.
This will open a new tab or window. Be sure to keep the original tab/window open, as we’ll return to it a little later.
In the new tab/window, you’ll be asked for several details to prepare your consent screen. This is the permissions screen that will display to you later in the setup process (never seen by your users).
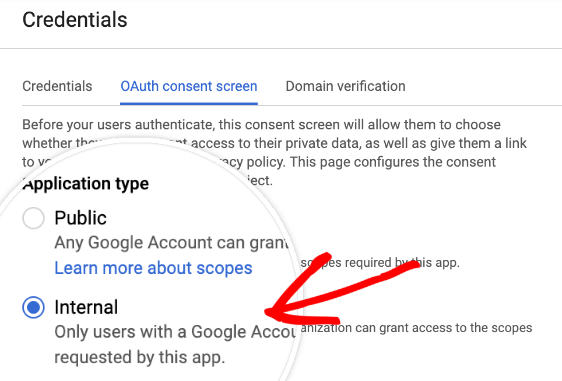
If you have a G Suite account, you’ll first set Application type to Internal. You will not see this option if you’re using an @gmail.com email account.
For Application name, you can add the name of your website (or any other name that feels logical to you).
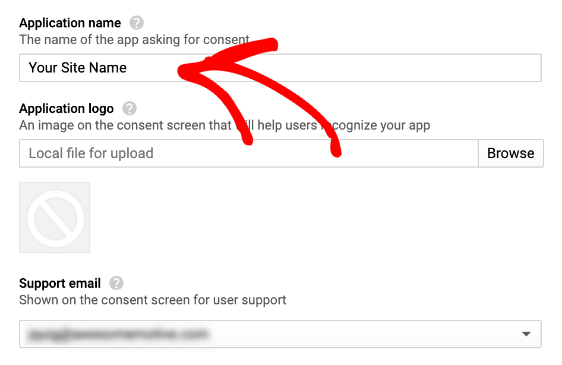
Then, you can skip down to Authorized domains and add the URL for your website. Be sure to not include http:// or https:// here.
For Application Homepage link, Application Privacy Policy link, and Application Terms of Service link, you can again just add your website URL. You don’t need to have special privacy or terms pages in place for this app, as again this consent screen will only ever be seen by you.
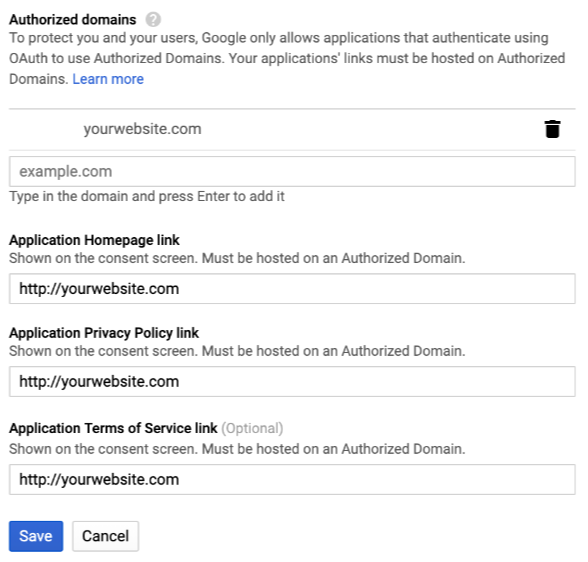
When you’re ready, click the Save button at the bottom of this screen.
After saving your consent screen settings, Google will take you back to an API credentials screen. You can ignore this, and instead return to the first tab/window.
For this step, you’ll be creating an OAuth client ID. OAuth, or Open Authorization, is what will provide permission for your website to use your Gmail account to authenticate emails.
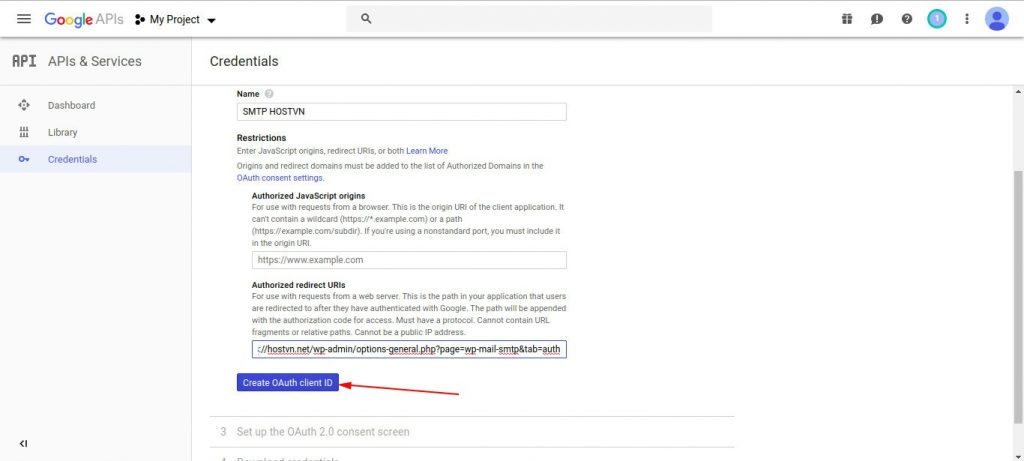
For the Name field, enter anything you like or leave the default name. This is only for reference within your Google account.
For Authorized JavaScript origins, you’ll need to enter your site’s URL.
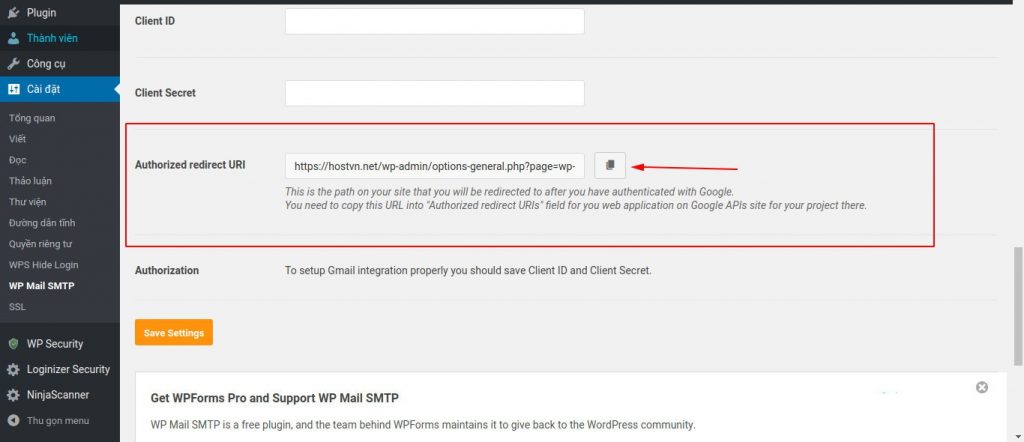
Last, we need to fill out the Authorized redirect URIs field. To get the URI for your site, you’ll need to go back to the tab or window with your WordPress site. Still on the Settings » WP Mail SMTP page, you’ll need to look under the Gmail section for the field labeled Authorized redirect URI.
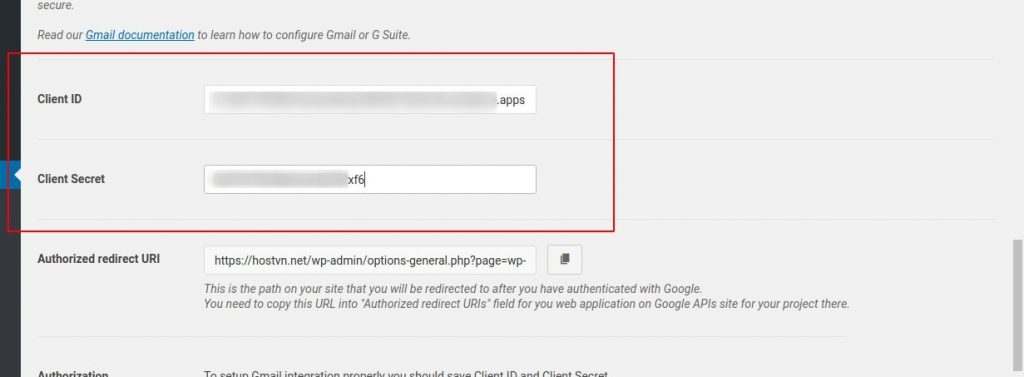
Tiếp theo quý khách quay trở lại trang cài đặt plugins WP Mail SMTP và copy nội dung trong ô Authorized redirect URI
Dán nội dung đã copy vào ô Authorized redirect URIs trên trang cấu hình API Gmail và bấm nút Creat OAuth client ID
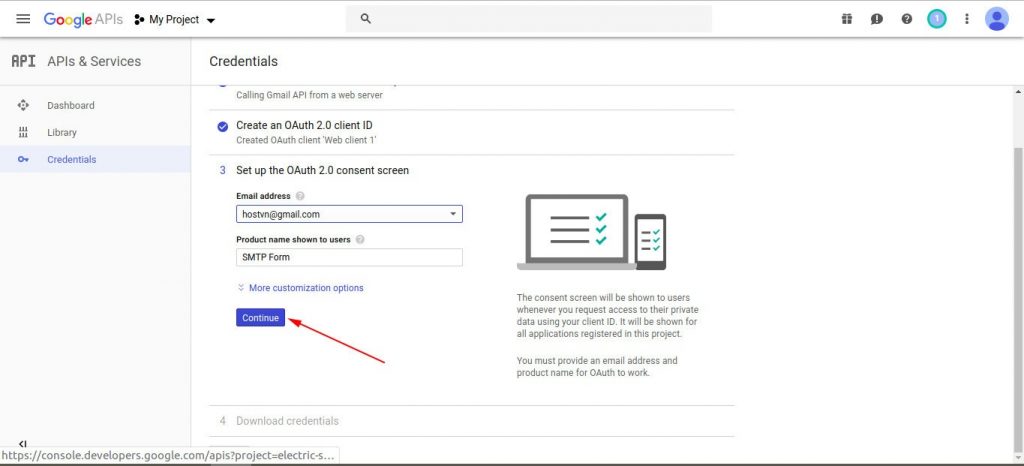
Điền thông tin tùy ý vào ô Product name shown to users và bấm nút Continue
Bấm tiếp vào nút Done đã hoàn tất việc tạo Client ID và Client Secret

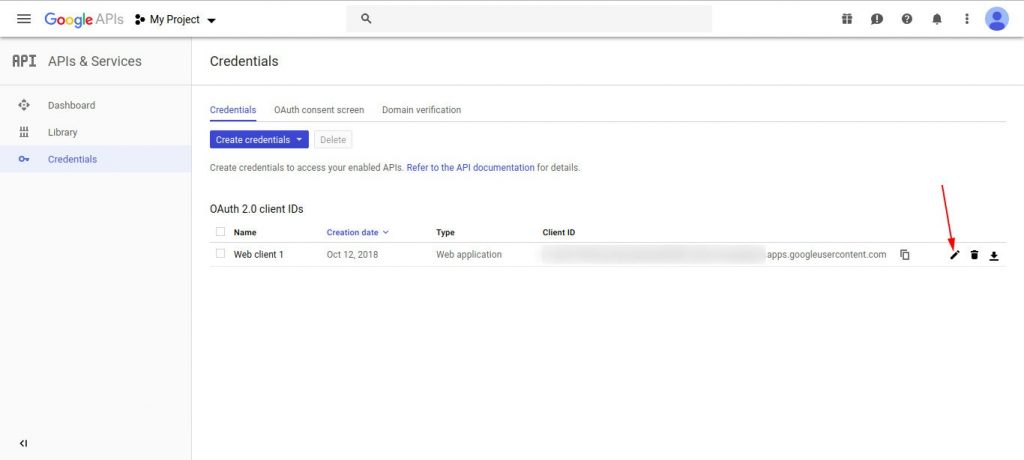
Tại giao diện quản lý IDs các bạn bấm vào nút hình cây bút để lấy Client ID và Client Secret
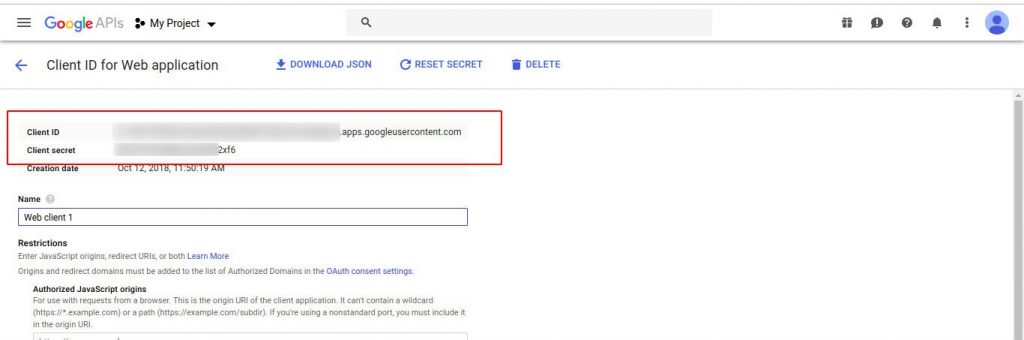
Sau khi đã có Client ID và Client Secret quý khách quay lại trang cài đặt WP Mail SMTP và điền Client ID, Client Secret vào 2 ô Client ID, Client Secret
Sau khi điền quý khách kéo xuống dưới và bấm Save Setting

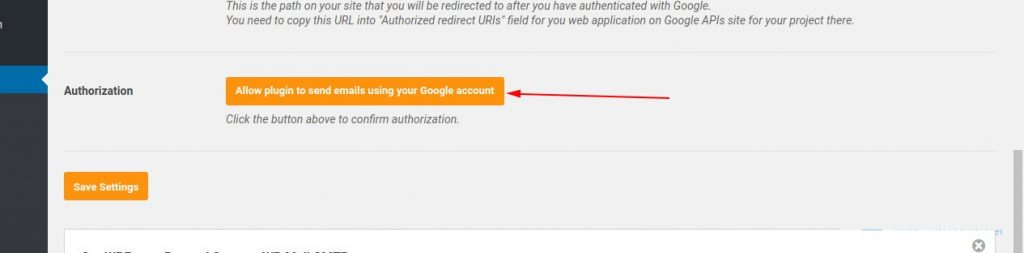
Phần 3: Xác thực và kiểm tra việc gửi mail
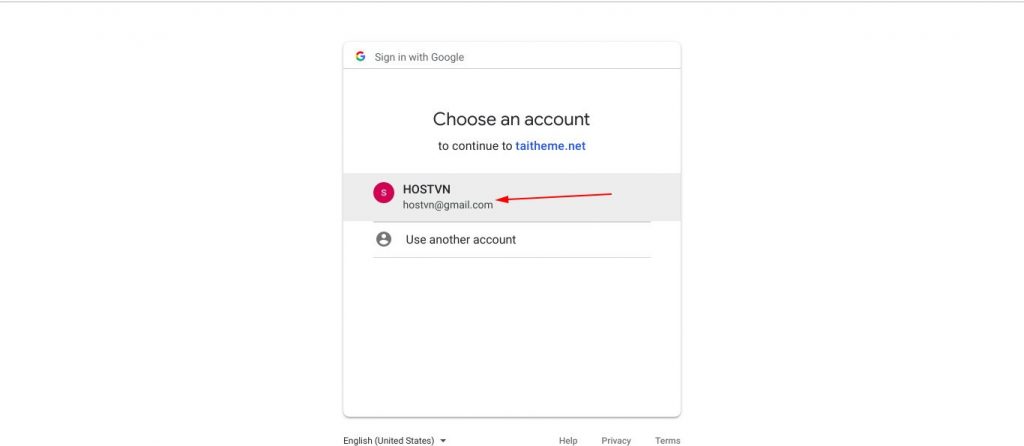
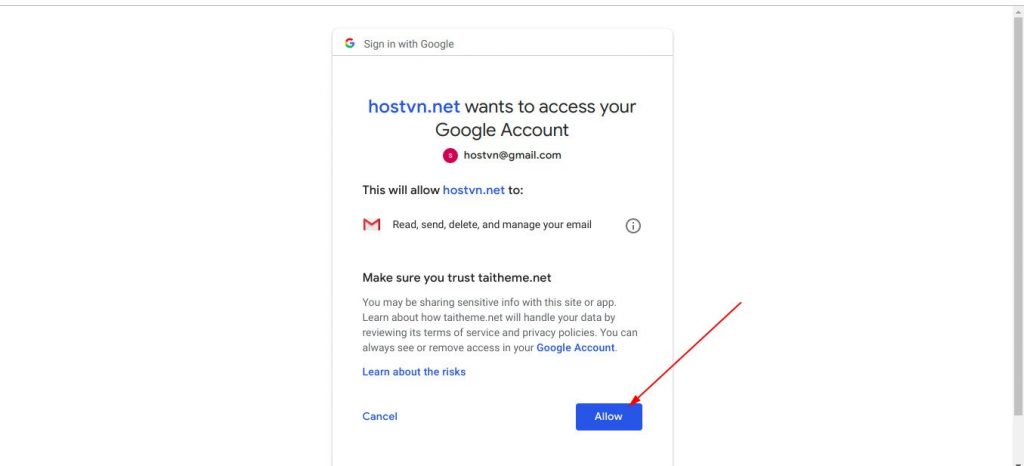
Để có thể gửi mail qua SMTP của Gmail quý khách cần tiến hành xác thực. Để xác thực quý khách bấm nút Allow plugin to send emails using your Google account
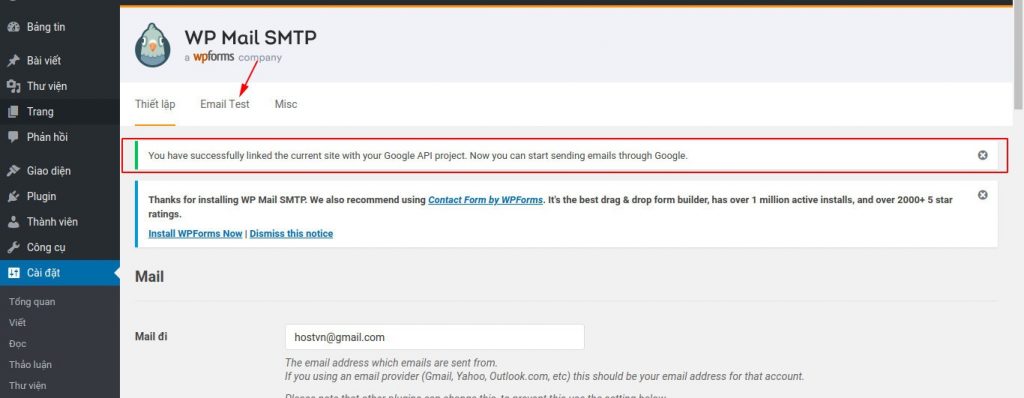
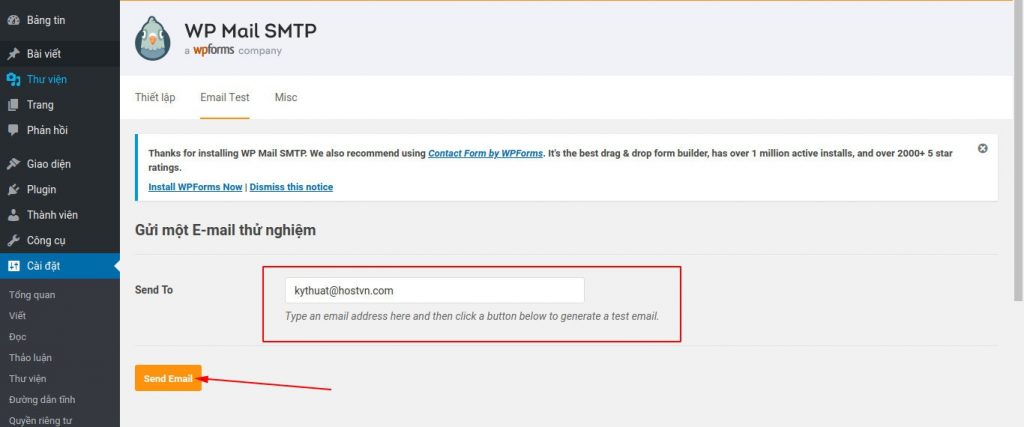
Sau khi nhận được thông báo cài đặt thành công quý khách chọn Email Test để kiểm tra việc gửi mail
Chúc quý khách thành công.